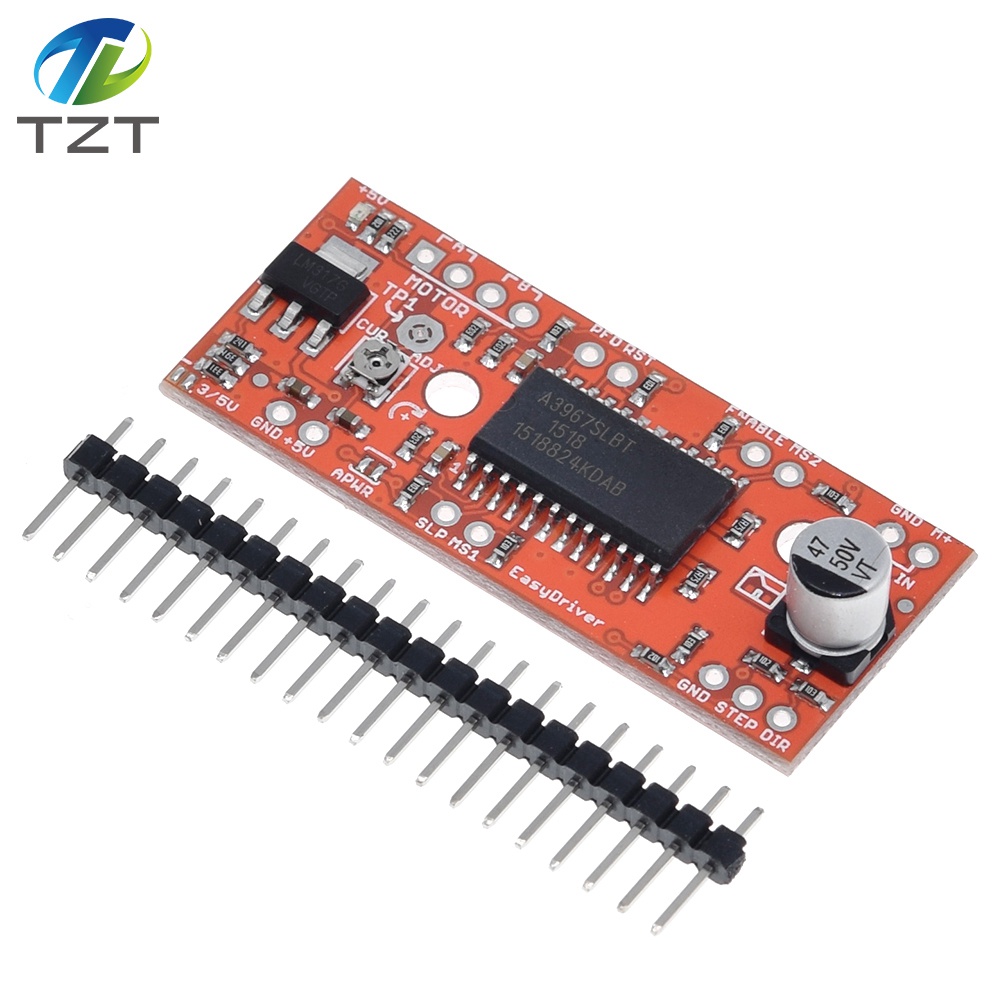
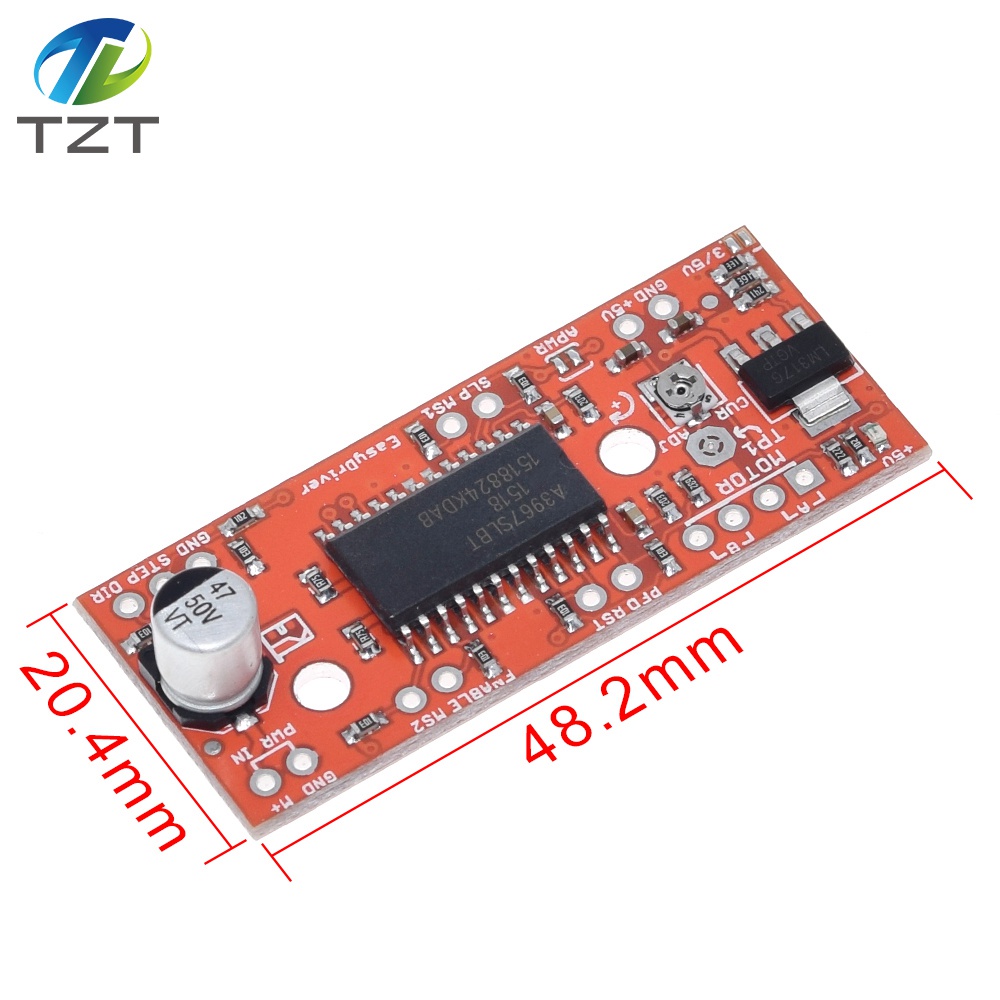


Itdoesn't
get much simpler than that. What is the code doing? It setsup pin 8 and 9 as
outputs. It sets them both low to begin with.Then in the main loop, it simply
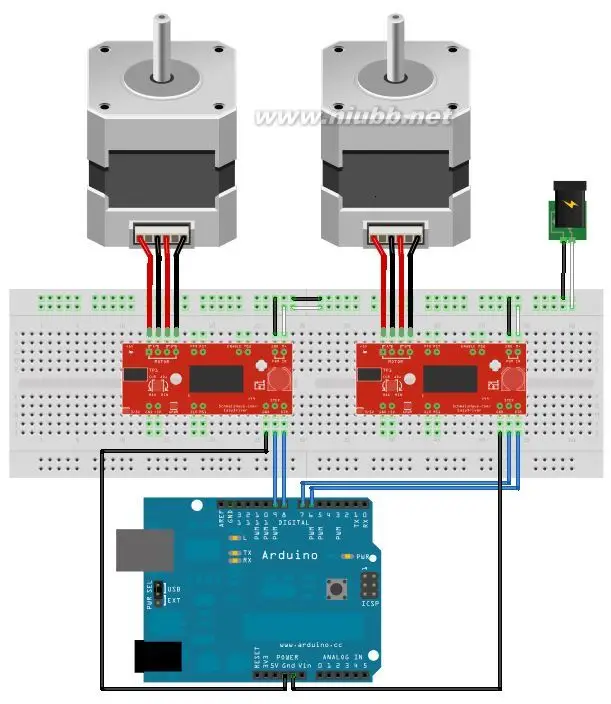
toggles pin 9 high and low,waiting 1ms between toggles. We use pin 9 as the STEP
control andpin 8 as the DIRECTION control to the Easy
Driver.
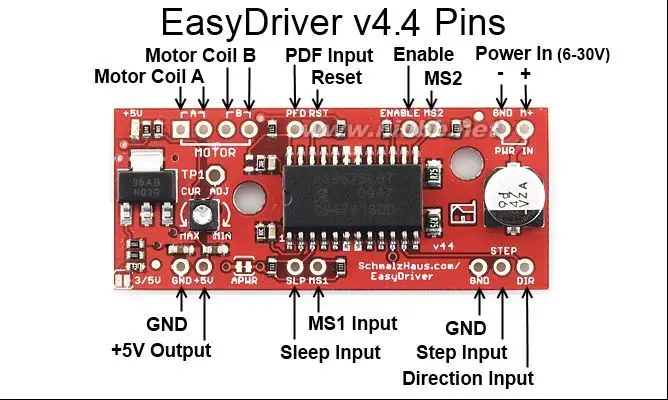
Sincewe are
not pulling either MS1 or MS2 low on the Easy Driver low,the Easy Driver will
default to 1/8th microstep mode. That meansthat each time the "digitalWrite(9,
HIGH);" call is executed, thestepper motor will move 1/8th of a full step. So if
your motor is1.8 degrees per step, there will be 200 full steps per
revolution,or 1600 microsteps perrevolution.
Sohow fast
is this code going to run the stepper? Well, with the STEPsignal 1ms high and
1ms low, each complete pulse will take 2ms oftime. Since there are 1000ms in 1
second, then 1000/2 = 500microsteps/second.
Whatif we
wanted the motor to go slower? We change the delay(); linesto have longer
delays. If you use delay(10); for both, the you'llmove at 50
microsteps/second.
Whatif you
wanted the motor to go faster? We can't really delay forless than 1 ms, can we?
Yes, of course we can! We can change thedelay() calls to delayMicroseconds(100);
calls and then each delaywould be 100 microseconds (or us), so the motor would
be driven at5000 microsteps/second.
Now,one
thing you should play with is the current adjustment pot onyour Easy Driver. You
need a tiny little screw driver to turn it,and be sure not to force it too far
one way or the other (they'redelicate). Also, some Easy Drivers were built with
pots that haveno physical stops on them, so they spin around and around. As
yourun the above code, slowly turn the pot one way or the other.Depending upon
the type of motor you have (and its coil resistance)you may hear/feel no
difference as you spin the pot, or you maynotice quite a big
difference.
Nowusing this sketch, we move for 3600 steps in one direction, pausefor a bit, and move 3600 steps in the other direction. I'm sure youcan figure out how to make many different lengths of moves now. Andyou can change the delay between steps for each move to occur atseparate speeds.
Thiscode does basically the same thing as Example 2, but usingacceleration/deceleration via the AccelStepper library, and runningfor twice as many steps. (Thanks Mr. Duffy for pointing out thisimportant fact!) The reason it runs twice as many steps is becausewe do "pos = -pos" to keep things short and simple. This means thatit will run from 0 to 3600, then from 3600 to -3600 (which is 7200steps).
pos1 =-pos1;
Ifyou run
this code, you may find that the acceleration anddeceleration are not quite as
smooth as with a single motor (on anArduino - again, this problem doesn't occur
on chipKIT) - that isbecause our two maximum speeds (3000 and 1000) are pretty
high forthe ability of the processor to handle them. One solution is tomake your
max speeds lower, then switch from 1/8th microstepping to1/4, half, or full step
mode. If done right, you'll see the sameshaft rotation speeds, but with less CPU
load (because you aren'tgenerating as many steps per
second.)
Youcan see
that for this example, I just copied and pasted the codefrom Example 3 and made
two positions and two steppers. Thisexample code is very simple and not all that
useful, but you canstudy the existing examples from the AccelStepper library,
and readthe help pages on the different functions, and get good ideas aboutwhat
else you can do with your stepper control.


.png)
China (Mainland)
 TUOZHANTENG electronic components Co., LTD
 0755-82527072
 384834800@qq.com / 1244995775@qq.com
 3013 Hongli Road, Shanghang Building 5F/511, Huaqiangbei , Futian , Shenzhen , Guangdong , China.
Hong Kong, China
TUOZHANTENG HK CO., LTD
emily384834800@gmail.com
Room 1103, Hang Seng Mongkok Building, 677 Nathan Road, Mongkok, Kowloon, Hong Kong
WhatsApp +86 15920041318/ +86 17620404465
![]() WeChat +86 15920041318/ +86 17620404465
WeChat +86 15920041318/ +86 17620404465
Skype +86 15920041318
Telegram/ KakaoTalk :+86 15920041318
.png)
Tel
